I have been deliberating over which programming language to use for this and the next few blogs. I have decided to use Visual Basic 2010 Express.
My thinking is this – I expect you have used some previous simple programming tool such as Scratch and are now thinking of the next stage. If you were to present the students with a rather bleak screen and equally austere prospect of coding in just script, then I think you are unlikely to carry the whole army with you.
Visual Basic enables users to see and use ready-made objects such as forms, command buttons, combo boxes and just add a few lines of code to make a functioning program. It is sufficiently powerful to allow your top students to follow their dreams and sufficiently simple to allow even the slowest in the class to produce something that “works”. Oh, and it’s free!
I’m going to describe how to download a copy of the program and register it. You need to register the program because you will be using it for more than the 30 days “trial” period. Registration is free, but you need to have a Microsoft Account.
Obviously don’t attempt to do this on the fly with 10.X going full strength in the background. Once you have working copies of the program on your machines then the second part of the blog is used to provide the backbone of your first programming lesson; of course there are, additional advantages in that pupils can continue to work at home.
Arrangements needed prior to the lesson
1. This is the MS website where you can find the program:
http://www.microsoft.com/visualstudio/eng/products/visual-studio-express-products
2. Choose 2010 Express Products
3. Click “See Download Details”
4. On the next screen choose (Click) “Visual Basic 2010 Express”
5. Check that the language is English and click “Install now”
6. Save the file vb_web.exe then double click the downloaded file; the file unpacks Setup starts
7. Click Next on the next page
8. On the next page click the radio button “No, I do not. Download the installation automatically” then click Install
9. Once the program has installed you can register it, but you will need to create a Microsoft Account first (or log into your existing account if you already have one)
10. The Start Page has an example (“Quickly Create Your First Application”) which you can use to get the feel of the interface.
11. For classroom security it is a good idea to use Options in the Tools menu on the Menu bar to set the number of projects viewable on the Start Page (Environment -> General) and you may want to tell students to set a default folder in which their work will be saved (Projects and Solutions -> General).
Now for a suggested first lesson…
Background
Very little formal knowledge is needed for this project. Students are introduced to the terms:
• Form
• Button
• PictureBox
• Properties
And the ideas/concepts:
• The distinction between the Name property and its Text property
• Changing the property of an object at design time
• Changing the property of an object at Run time
It is worth taking pupils through this step by step (demo on the whiteboard for example) to avoid confusion; the interface will be new to them and the changes of screen when swapping between design, coding, debugging/running are places where some of the cavalry might get lost in the woods.
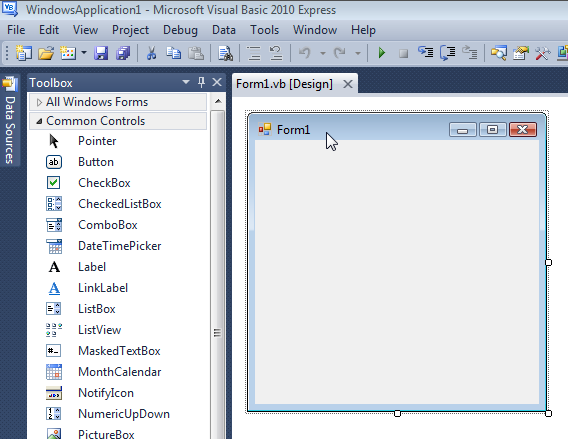
It is good practice (and eventually very necessary) to change the Name property of screen objects from their default names. You may want to pin the Toolbox to the design interface which avoids wondering where it has gone (it automatically hides):

You will need an image – a jpeg is fine.
First lesson
1 Open Visual Basic 2010 Express
2 On the Start Page click New Project

3. On the New Project page select (double click) Windows Forms Application
4. The design page opens with Form1 shown:

5. Stretch the form so that it is twice as wide and twice as high
6. Is the Properties pane on the right hand side of the screen? If not click View on the toolbar and select Other Windows -> Properties window.
7. Click in the form to highlight it and then find the property Text
8. Delete “Form1” and type in “Show Hide”

9. Now find the property (Name), delete “Form 1” and type in frmShowHide. The reason for the name is that form is used by programmers as prefix to a form name and the ShowHide part of the name is just a convenient way of remembering what the form does.

10. Now go to the Toolbox and select (Click) a Picture box.
11. Draw the box on the form:

12. Notice that the Properties pane has changed to display the properties for PictureBox1.
13. Change the Properties as you did for the form, but this time use:
Property Setting for the property
Name picDog (or something suitable for the image you are going to use)

14. Click the Image property and then the three dots that are revealed:

15. Click Local resource and then click the Import button. Now navigate to where the picture you want to use is stored on your computer:

16. Click Open and then OK in the Select Resource box
17. You very probably will only see part of your picture in the picture box on your form, so you will need to correct this using the PictureBox properties. Click in the picture box to highlight it and then find the SizeMode property. Open this and select (click) StretchImage:

Now you should find that your picture neatly fills the picture box
That’s enough for today, so now we’ll save our work
18. Click File on the menu bar and then select Save All. The following dialogue box appears:

Use the Browse button to navigate to where the work is to be saved, then type in a suitable (and memorable!) filename and click Save.
We’ll add some controls in the next blog so that we can make our picture appear and disappear.
John Giles
John Giles is an educational consultant and author specialising in IT and computing. He works closely with exam boards, and has written syllabuses and exam papers.