With the warmer summer weather on its way, there’s no better time to take science out to where it all happens and at the same time, incorporate a little art into the mix. These activities work for a range of ages and will ensure fun is had along with the learning.
Activity: Investigating Tree Bark
Suitable for:
Year 3 to Year 6
Learning Focus:
- Understand why trees have bark, some smooth, others rough
- Make a tree identification guide based on bark

Find a tree in the school grounds and ask the pupils to name the different parts of it and what each part does. Most children should know that the bark is a little like our skin, it protects the delicate and important inner parts of a tree from harm.
Ask them if they know what we think of as the tree’s ‘blood’ is called (sap). Tell them that this flows around the tree in a thin layer just under the bark and that if it wasn’t for the bark, the sap would dry up and the tree would die.
Try to find two trees with different types of bark, one smooth and one rough. Ask the children to feel the difference between them with their fingers. Can they suggest reasons for the difference?
Smooth bark is slow growing and is usually found on slow growing trees. Bark which is rough is caused by the tree growing quickly and the bark splits and cracks as the trunk expands.
For a classroom record of our work, ask the pupils to do bark rubbings of the trees using crayons and paper. Then, back in class, use the guide available here: http://quest42.co.uk/woodwork/treebark/treebark.htm to identify what species the trees are.
Activity: Craters
Suitable for:
Year 2 to Year 6
Learning Focus:
- Recognise the distinctive mark left behind by a meteor impact
- Understand how impacts leave different craters in different materials
Show the pupils a picture of the moon and ask them to identify any features they can see. One of the features should be the craters left by meteor impacts.
Ask them to describe the crater in more detail then tell them that they are going to make their own craters.
You’ll need trays of sand, wet mud and not such wet mud together with some marbles.
Ask the children to drop the marbles onto the trays from different heights, different angles and at different speeds, photographing the results. Do they notice any differences in the splatter pattern? With the mud craters, it may be possible to let them dry out and put them on display. You could even use plaster of Paris.
If you have a video camera available, it’s worth videoing the event from the side and then playing it back at a slow speed to see what happens.
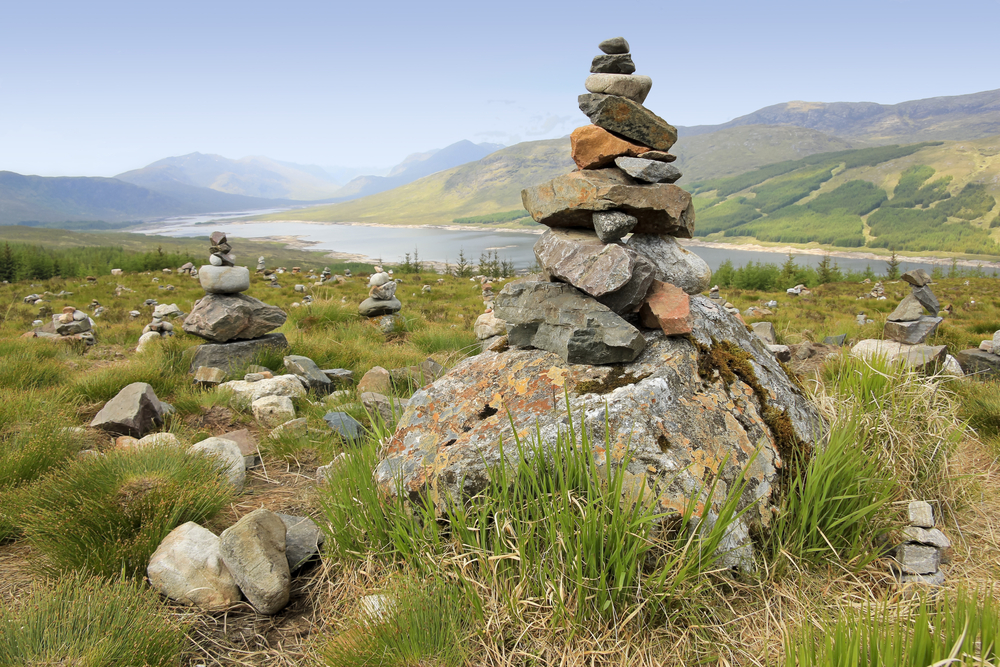
Activity: Cairns
Suitable for:
Year 2 to Year 6
Learning Focus:
- To understand what cairns are used for
- To make a cairn of their own as part of a trail
Ask the pupils to remind you of the story of Hansel and Gretel and in particular, how they found their way home from the woods.
Now ask them to imagine that they were Hansel and Gretel and instead of being taken into the woods, they were taken up into the mountains. How would they mark the way to know their way home?
After discussing their answers, show them the picture found at http://bit.ly/1B0LdFw and ask if they know what the stone tower is called and what it’s used for?
These stone towers are called ‘cairns’ and they have been used for millennia to mark trails or the tops of hills and mountains.
Arrange for a trip to a pebbly beach or a stony area and ask the pupils to make their own cairns at suitable points in the area. They should think where the cairn should be located for visibility and how they could use it to indicate where they need to go to next in designing and setting out a circular trail.
Sometimes, all walkers have to do is reach a cairn and scan the horizon to find the next one and walk to it.
Cairns don’t just have to be functional, they can be attractive too. Ask the pupils to think carefully about the design of their cairn and photograph it after they have completed it.
Activity: Design Your Own Butterfly
Suitable for:
Year R to Year 6
Learning Focus:
- To understand why butterfly wings come in different colours and patterns
- To be able to describe how their design fits with the habitat of the butterfly
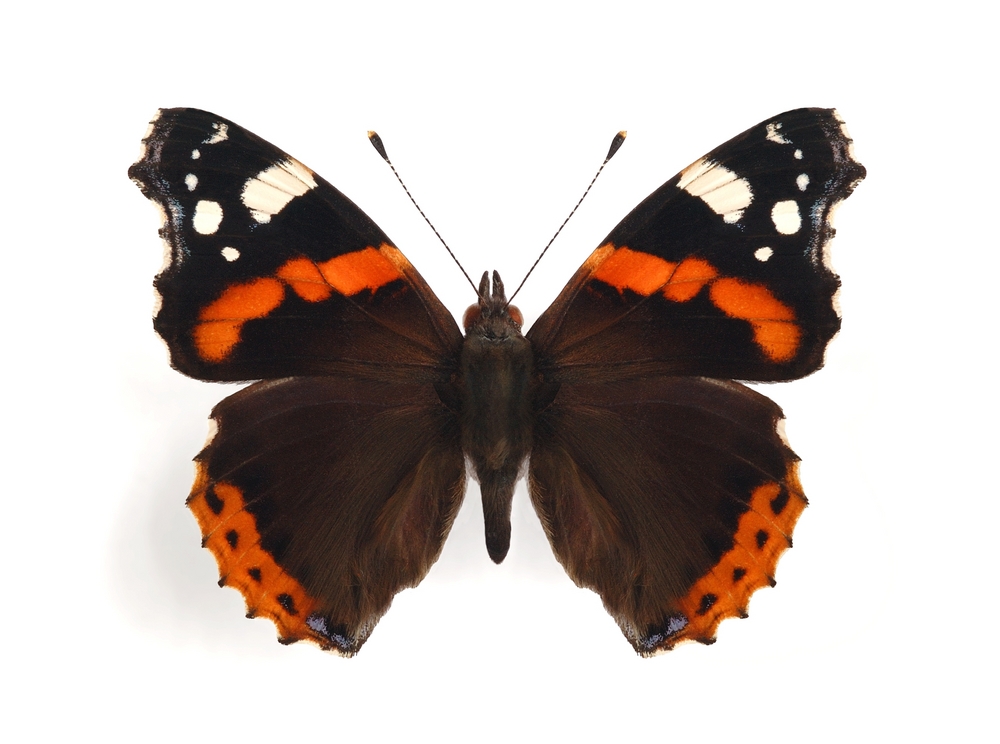
Look at pictures of different common butterflies such as the Red Admiral, Tortoiseshell, Skipper, White and Peacock. All of them have different colours and patterns on their wings.
You’ll find plenty here: http://www.britishbutterflies.co.uk/
Ask the children why they think the butterflies are different? We need to be careful here because many pupils will say that the butterflies’ colour is for camouflage but this is not always the case. The Peacock, for example, is designed to frighten predators with the large ‘eye’ on its wings.
Tell them that they are going to design their own butterfly and that they will need to think about where it lives, if there are predators around and whether it needs to be camouflaged against its surroundings. Make the pictures big and they’ll be perfect for a summer classroom display. Older pupils should be asked to do a small piece of writing to accompany their picture to explain their design.
They should remember that butterfly wings are symmetrical when they paint or colour their design.