With Malcolm Pollock, author of Abracadabra Flute Technique
Here’s the last of 6 blog posts aimed at teachers of beginner flute players. This series looks at some common challenges faced by pupils and teachers and breaks them down into simple steps to make teaching technique easy even if the flute is not your first instrument, or if you teach a mixed ability group.
Teaching finger technique
For the fingers to work efficiently when playing the flute, the instrument should be held correctly and be well balanced. If the flute is balanced then potential strain and tension on the fingers and hands can be avoided.
Holding the flute is not a particularly natural thing for a human being to do. For a start it is very “lopsided”. Start this blog by looking back at my second blog on hand positions, describing the three balancing points (the lower lip and chin, the left index finger and right-hand thumb).
Smaller pupils may have difficulty holding the flute even using a curved head joint because their fingers are so small. It’s up to you the teacher as to how you handle this. No matter how insistent the pupil or the parent is, sometimes it is better to delay starting smaller pupils: they can do so much damage trying to play an instrument that is too big for them!
Left hand basic finger exercises
- Make sure the pupil is holding the flute correctly and that their posture is good (see previous blogs!) Pupils should stand up in their lessons if at all possible. A mirror is very useful too to enable pupils to see and adjust their own fingers.
- Put the flute on the pupil’s lip. Without blowing get them to move their fingers from G to A.
- The fleshy parts of the finger tips should be in the middle of the key. Unless you do this on an open holed flute you will not be able to play. However, on a closed-hole flute pupils can get away with murder! It is very common for the G and A fingers to move to the edge of the key.
- Does the flute move at all when they do this? If not try A to B, then B to C.
- B to C is more difficult because the LH thumb comes off for C: make sure the flute is still balanced! C to C sharp is even worse: there are almost always a few problems with balance.
Right hand basic finger exercises
- Now let’s try the same thing with the right hand. Start with D to E, then E to F and F sharp, and finally F or F sharp to G.
- Danger points include the RH thumb slipping forward which destabilises the balance overall and means the RH fingers have to move to unnatural positions. As with the LH fingers make sure the fleshy parts of the tips are in the middle of the keys.
- Also, make sure that the D sharp key is ALWAYS used when needed (that is for all notes except D)!
Now try this blowing the flute……
When first doing these exercises blowing the flute it’s OK to play slowly and to separate the notes. Once pupils become more proficient you can make it harder by increasing the speed and adding slurs.
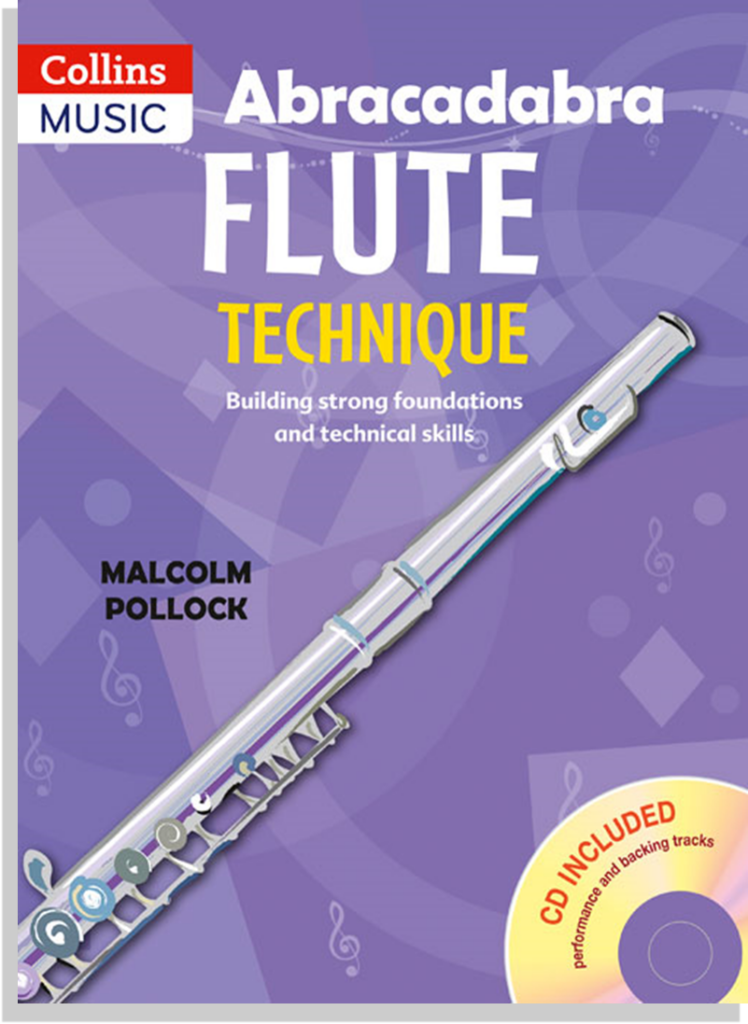
There are lots of helpful diagrams, explanations and exercises covering all basic aspects of flute technique in my book: Abracadabra Flute Technique. This is specially designed to act as a companion to Abracadabra Flute but can be used alongside any tutorial method.
Malcolm Pollock has spent a lifetime supporting young musicians through local authority music services, as a teacher, conductor and manager. His last post was the Head of Gloucestershire Music. He was the Chair of the British Flute Society from 2015-2018, and is the author of Abracadabra Flute and Abracadabra Flute Technique.