80 years ago the Hoover Dam opened in the Black Canyon on the Colorado River. At the time it was the largest construction project ever attempted and used previously unproven technology and building techniques. In the course of its construction over a hundred workers lost their lives but it was acknowledged then, and even today, as one of humankind’s greatest construction feats.
Activity One – Why are Dams Built With Concave Walls?
Suitable for Years 4 to 6
Learning Objectives:
- To be able to understand that some structures have greater strength because of the shapes used in their construction
- To be able to carry out a fair test, recording results accurately and drawing appropriate conclusions by referring to the results
Display the above image of the Hoover Dam on the interactive white board and ask the pupils to comment on what they see. The pupils should say, amongst other things, that the dam is curved at the rim. Some may also notice that the dam is curved from top to bottom too.
Why was it built that way? The practical aspect of this activity will explain why.
The theory behind concave dams is identical to that behind that of arches. Arches are one of the strongest shapes to support a force and a dam constructed in a concave manner will benefit from the strength of the ‘arch’ within it.
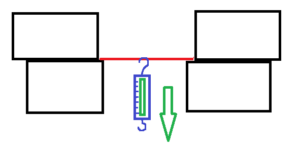
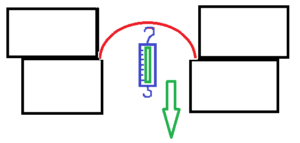
To begin with, put the pupils in groups of three and give them nine pieces of A4 card and ask them to glue three together whilst laid flat, and two lots of three glued together as curves which are close to being a semi-circle. Make a hole in the centre of each so the hook of a Newton meter will fit. Now arrange piles of books so that the three sets of cards will stand between them. Get one child in a group to ensure the books don’t move. Ask the second pupil to link the Newton meter through the card and pull gently. The third pupil should read the scale of the meter until the card gives way and pulls through the books. The cards should be placed as below but with the third card inverted.
By collecting the measurements of the force required to dislodge the card, the pupils will discover that the concave design will resist the greatest force.
Activity Two – Is a Triangle the Strongest Shape?
Suitable for Years 3 to 6
Learning Objective:
- To be able to conduct a fair test, collecting accurate measurements and interpreting them
- To be able to recognise which 3D shapes are best suited to resist a force
In this activity, the pupils must begin by making identical sets of 3D shapes from nets using paper. We suggest that you make cubes, square based pyramids and triangular prisms. When you have sufficient of each (around 10 to 20), collect the 3D shapes and ask the pupils how they suggest you should arrange them to be able to support a downward force acting on them. Take photographs of their suggestions then place a piece of thick cardboard over the shapes and begin loading it with weights. Take a note of the mass used until the shapes collapse.
Ask the pupils to say which was the best 3D shape for supporting the load and why they thought it was successful. Now ask them to draw the shape in 3D and mark on it where the forces were acting and how the forces were counteracted. If you have plenty of shapes, try constructing a ‘solid’ from inverting the pyramids and prisms to see if there is an improvement. Why is this the case? Draw the 3D shapes again and mark in the forces. Does this help to understand why the new design is better?
Activity Three – Why is an Egg Oval?
Suitable for Years 3 to 6
Learning Objective:
- To be able to set up a fair test
- To understand why the properties of an egg’s shape help it perform its function
Eggs are actually quite a strange shape but why did nature design them that way? Almost all birds’ eggs are shaped exactly the same so there must be something in it?
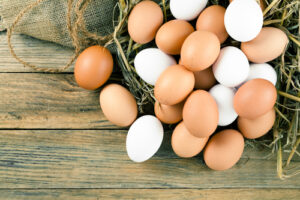
Hard boil some eggs for safety and pass them around the class for the children to look at. Ask them to tell you what they notice about the properties of the shape of the egg.
Test One: Roll an Egg
Using our eggs, roll them down a gentle slope alongside a similarly sized round object like a golf ball. What do we notice? The pupils should tell you that the egg rolls unevenly and more slowly than the golf ball.
Why do they think this is? How is this property useful in nature?
Test Two: Eggstra Strength
For this test, use a box of eggs and leave the eggs in the box before placing a thin piece of wood on top. Ask the pupils how much weight they think the eggs will bear before breaking. Start loading the wood with weights, noting the total carefully. The eggs will invariably support much more weight than the pupils suggest. Can they suggest why? Refer back to the second activity for clues.
Test Three: Break in, Break out
This is more of a puzzle than an activity. Ask the pupils how it is that if the egg is so strong (see test two), a chick can break its way out of the egg. Some will remember the learning from Activity One but others may need reminding of the strength of concave and convex surfaces.


